The technique chosen for the cellar floor is the herringbone (opus
spicatum), one of the most classic and decorative motifs used since ancient
times.
I rely on a simple but effective material for laying on the concrete base:
vinyl glue. This glue is white at first, but becomes transparent when it
dries, thus avoiding annoying stains in case of smudging. The only “flaw”:
it’s water-soluble, which is why I can’t use the Domus as a garden
decoration!
First, I place a row of bricks along the entire perimeter of the basement
and around the bases of the pillars until they form a sort of frame.
However, I am very careful not to let the glue leak out of the cracks, and
for this I use a pair of metal tweezers that allow me greater precision (the
bricks are definitely small in this scale, and working exclusively with my
fingers would risk a nervous breakdown).
After the frame, I begin laying the first row of bricks at a 45-degree
angle, preparing small areas of the floor with glue from time to time. If
there are areas of unused glue, I remove it before it dries so that its
volume does not interfere with the laying of the next bricks.
Everything goes more or less smoothly, with the only difficulty being
keeping the “spikes” straight. The bricks are not all the same length, and
some have to be reworked before being laid. In addition, the more than one
thousand pieces I made ran out about halfway through the work, forcing me to
interrupt the laying to prepare a second board (a full day’s work between
modeling, cutting, drying, and later finishing with sandpaper).
Once the composition of the spikes is finished and the remaining corners
along the edges are filled with custom cut bricks, I evel the entire floor
with some rather vigorous sanding.
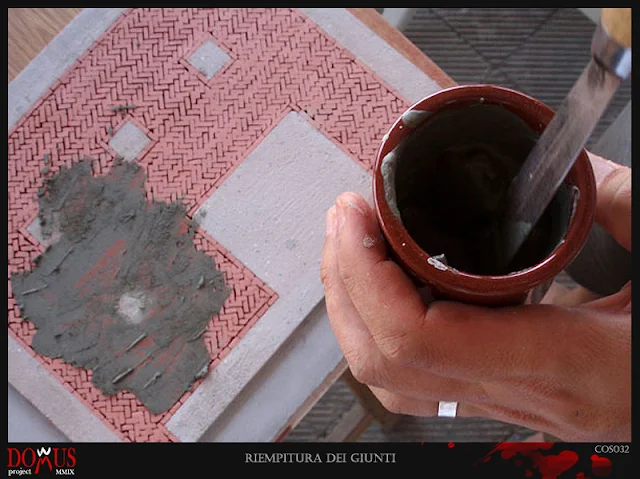
The last step, after thoroughly cleaning the surface from clay dust (a sea
of dust), is to fill the joints with cement. I use quick-setting cement,
which reaches optimum hardness in 2 to 4 hours and can be applied without
the addition of sand. This makes the mixture more fluid and it penetrates
better into the spaces between the bricks.
At this point I let it dry, although I’ll have to sand the entire surface
again later to fill in the recurring cracks. I’ll still leave some bumps and
minor imperfections to make it more realistic to the eye.
Cleaning is done with a slightly damp cloth, which allows the bricks to
re-emerge by removing excess material.


0 comments:
Posta un commento